Taking a sleeping pill- Anchoring with a Rocna Anchor

Large Rocna on the Bow

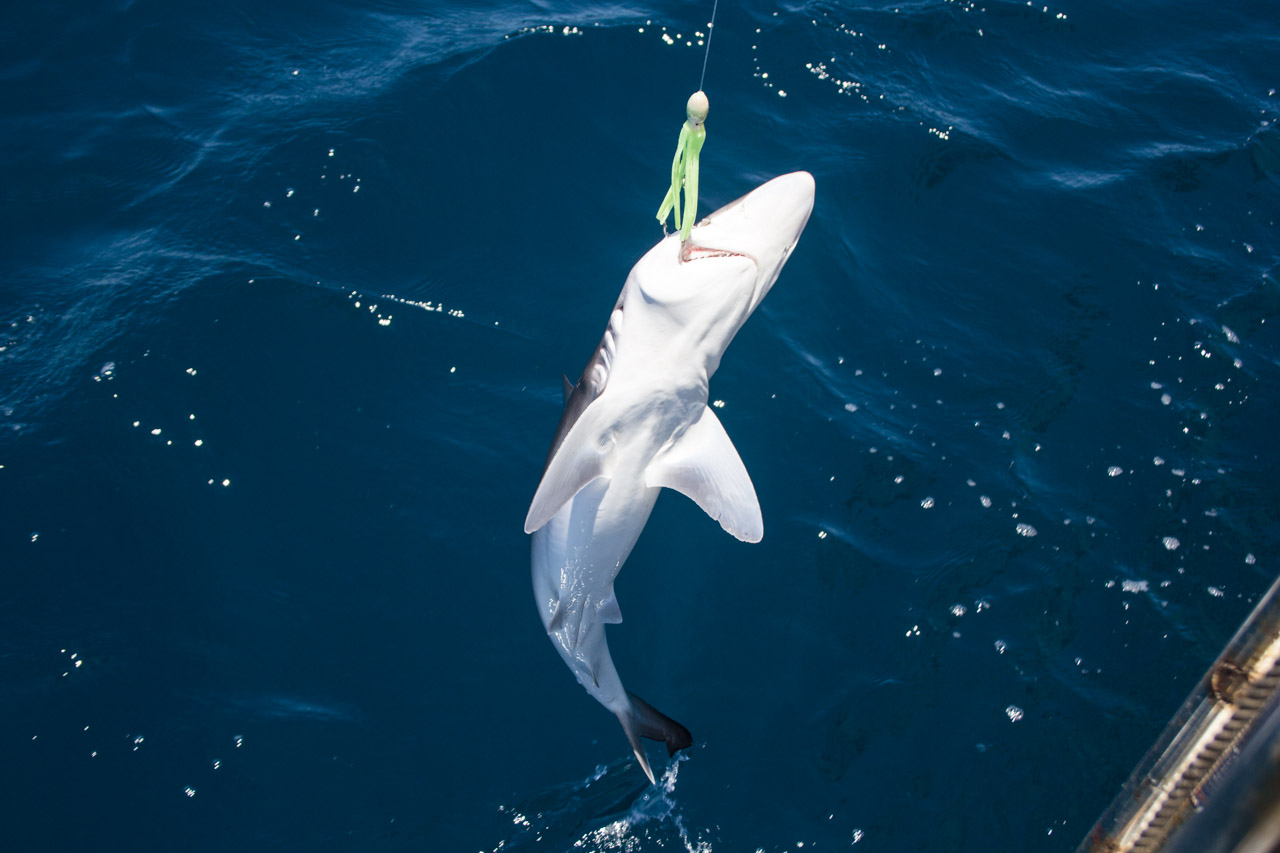
People always make fun of our huge anchor on the bow

Until last week, we had never drug our anchor. In fact, we have never even had to try more than once to get the anchor to set. So what works and why did that fail?

On Resolute our anchor setup consists of a Maxwell VWC 1500 windlass, 50 feet of 5/8” 3 strand nylon as the bitter end, 230 feet 5/16” galvanized chain, connected to a 25kg/55lb Rocna anchor.

A few things to point out, we do not use a swivel and have never needed it. The reason behind not using one is because we don’t like having extra things that can break in our setup. We also only have 50 ft of nylon rode because it is simply there as an “oh shit” safety in case we need to let out all our gear and ditch the anchor in an emergency giving us something to cut in a hurry. Lastly, our anchor is huge, in fact, so huge many people like to comment about it while at dock. This is because we like to sleep, sleep is important. I was once told that if people don’t make fun of your anchor, it’s not big enough.

We went with a Rocna anchor because we had heard good things about how they held in nearly any type of bottom and tended to be the choice of most high latitude cruisers who are used to anchoring in unknown sea beds with very strong winds. The main thing here is that it is part of the new breed of “diving” anchors such as Mantus, Spade, and Ultra. All of which are designed to bury deeper and deeper into the bottom the harder the pull.

With this setup we have anchored on rock, sand, mud, and kelp without having a single failure.

A few of the things we do to ensure a strong anchor set are:


1) Never pile up your chain at the bottom, pay it out slowly as you either drift back on the anchor or reverse back.

2) Once you have let out at least (more if stormy) 4:1 with all chain or 7:1 with rope, back down on the anchor increasing the RPM slowly as to help set the anchor. Once you are not moving (keep a foot on the chain to feel dragging) give it some more throttle and hold it there for some time 10 seconds or so.

3) Once you are satisfied all is well, hang out on the boat for another hour to see how the boat is riding (i.e. not hitting your neighbor!) and make sure the anchor holds with wind shifts.

4) If the water is warm, jump in and see what the anchor is doing! How did it set? Is it near rocks or coral?

Diving the anchor

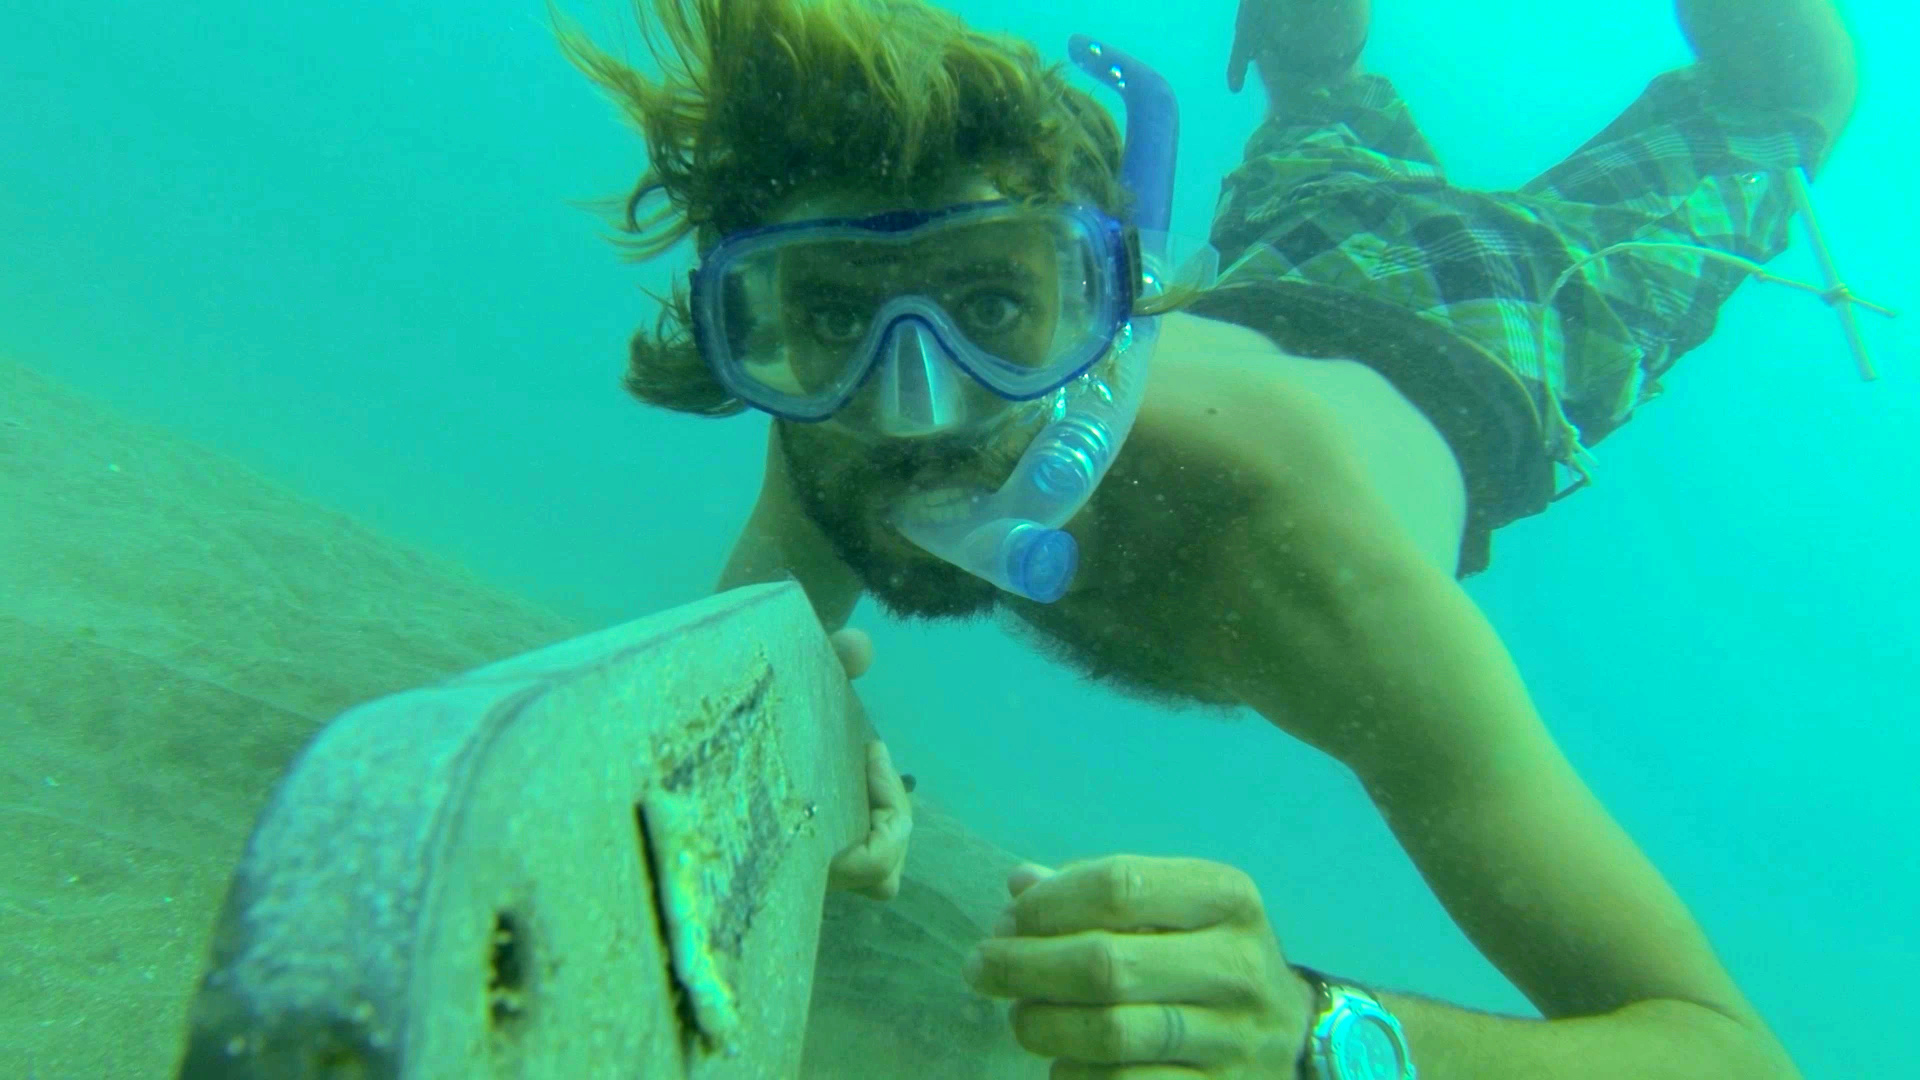
Diving on the anchor to check how it set is the best way to know what is going on down there

Some things not to do while anchoring:


1) Throw all your chain, anchor, and line over at the same time in a big pile.

2) Put out too little scope. We often see people putting out hardly 2:1 scope, and with rope rode at that!

3) Have too small an anchor

4) Leave your boat right after anchoring

5) Forget to check for chafe points on rode

6) Not have the bitter end tied to something

7) Leave the load on the windlass, tie to a cleat using a snubber line

So what went wrong for us this last week?


Well a few things really. We were in Lahaina anchorage on Maui, HI when we were forecast to receive higher winds possibly up to 45 knots. So what did we do, nothing. So complacency was a big factor. I know I just got done preaching about proper anchoring. But what we have noticed is that our setup holds very well. We had 5:1 scope out because the anchorage was deep at 42 ft. And we knew our Rocna holds very well in sand.

The winds held over 30 kts for around 48 hours with periods of sustained 40+. The gust that drug us was 51 kts and our anchor simply pulled a trough around 50 ft through the sand. At this point we let out another 50 ft of chain increasing our scope to around 6:1 and lengthened our snubber line to help absorb more of the shock loading. This held for the remainder of the blow.

I dove the anchor to find out just what had happened the next day and noticed that despite the anchorage looking like nice sand, it was only about 1-2 ft deep and must have had a rock bottom which did not allow the anchor to continue deeper and provide a firmer set.

Rocna anchor in sand

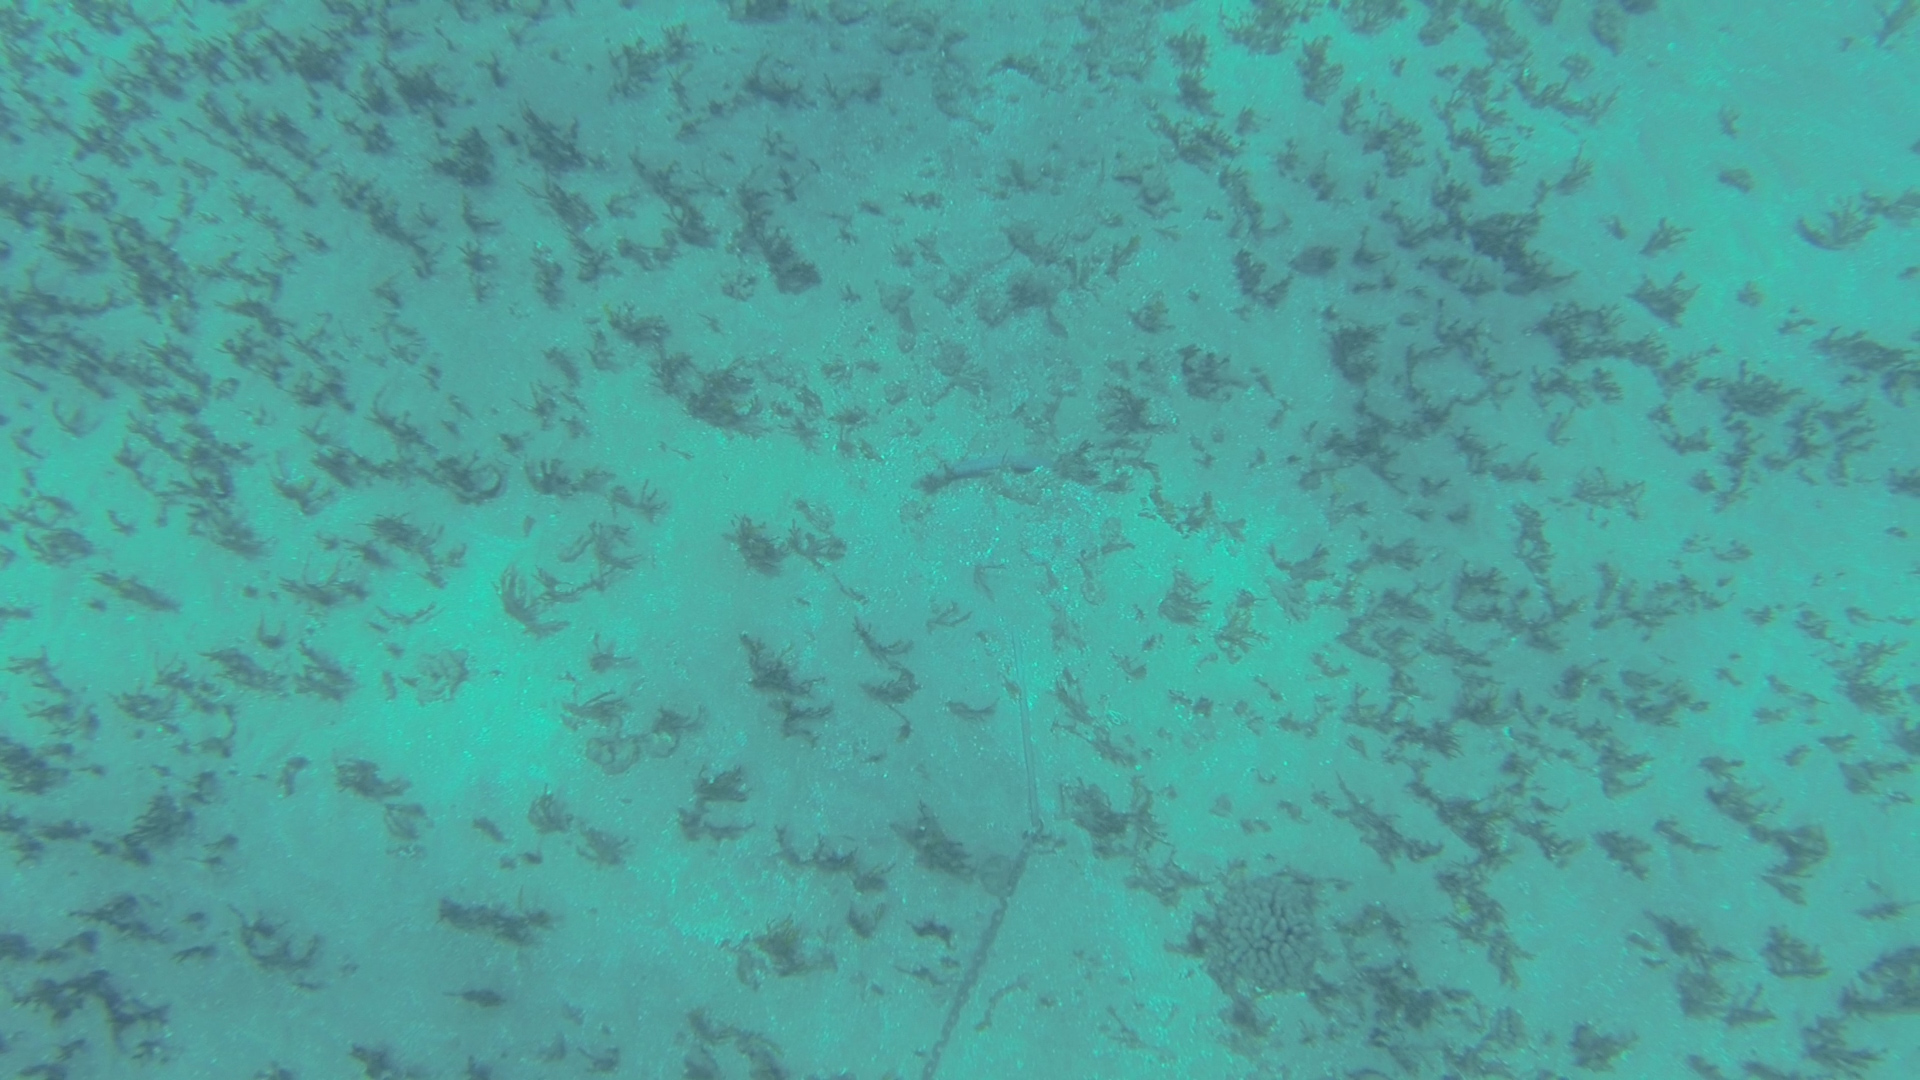
Our Rocna buried in the sand. You can see the drag mark to the upper part of the screen from the 51 knot gust

Our craziest fishing stories so far

We are nearly always dragging a lure behind Resolute. And why not, plucking your dinner straight from the sea just before dropping the hook in some secluded anchorage, who hasn’t dreamt of that at some time or other? We are not huge fisherman, our fishing tackle mostly consists of a few hundred feet of 100 lb test line, some different colored squids and the Cuban yoyo hand line. Despite this, we have been very successful in catching fish on practically all our passages. I think the secret is our pink squid!

We have a couple of catches that stand out from the other more normal tuna, black skipjack, dorado, etc. Our first was while leaving La Paz, we were around 3 miles outside of the entrance channel on a gently sloping sand shelf in around 40 feet of water when Meagan yelled “Fish On!!!” to me down below looking at our charts for the day. We did our usual, reduce sail to spill speed, drag the fish for a little while to tire it out and then begin hauling in on the hand line little by little. After what seemed like quite awhile, as this fish was fighting harder and a little different from others we caught previously, we saw our first glimpse of the tell tale shark fin. Hmm, “this might get interesting” we said to each other at the same time. Once getting the little shark alongside the boat we got a great view of this guy’s infamous shark teeth as he angrily snapped and thrashed trying to bite that pesky lure just inches in front of his cat like yellow eye.

After a little powwow and looking at how the lure was stuck in his jaw we decided the best course of action would be to slide a sharp knife right down the hook and slice open the flesh on his lips as he had not actually hooked any “bone”. This would hopefully leave us with our lure and him without a large hook or line trailing from his jaw for several days. If not making it harder for him to catch more food it would at least make him less attractive to the females I imagine, and I would hate to be the cause of that. The plan worked flawlessly and our little companion wasted no time sending a jet of water right into our faces as he muscled his way down to deeper and safer water.

The second time we were outmatched was when crossing from Guaymas on the mainland side of Mexico to Bahia de los Angeles on the Northern Baja Peninsula. We had around 60 feet of line out and were passing through the salsipuedes channel , a narrow channel renowned for its fast currents and funneling winds. Once again the call was made for “all hands to battle stations, fish on!”. I began pulling in and wham, “whoa, now this is a big fish or we just hooked the bottom” I said to Meagan, blue faced and straining to not loose my tenuous, sweaty grip on our severally outgunned hand line. I think at one point Resolute may have gone backwards, we will have to consult the GPS track for confirmation.  A little more fruitless panting and heaving on the line and we had gotten the behemoth to with, oh wait, we had given him another 40 feet putting our total line out to around 100 feet. It was at this point we we graced by one of the most amazing sights you can see, a beautiful sail rising out of the water and slicing the waves in front. We had caught a Marlin!! With a little more renewed vigor we managed to pull this 5-6 foot thrashing fish to within 50 feet of the transom when I nearly fell backwards and over the lifelines. “What was that?” I coughed as I began cautiously pulling in on the line again. We though the fish must have spontaneously died as there was clearly something on the line still but there was no fight left in him. The answer was soon revealed as we pulled the near zombie like remains of a Jack onto the side decks. The only explanation being that we had caught our Jack friend moments before he had been swallowed down and partially digested by our much larger Marlin friend. Fortunately for us, we were saved the head scratching of trying to figure out just how to get a 100 lb angry Marlin onto our boat without one of us being lanced through the stomach.

Any help identifying the shark species would be greatly appreciated by the way, my best guess was a small lemon, by I am the last person I would ask about such matters.


shark on the lure

Lifting the shark out of the water

Thrashing shark

Shark getting angry at the lure

zombie fish

Fish looking like a zombie after being inside a Marlin stomach

Musing on Mexican VHF

B&G VHF V50 radio

VHF Radio

The VHF radio is a very different beast in Mexico.

Less than 100 miles south of the border, the coast guard and distress calls that clutter channel 16 in San Diego are all but absent.  Replaced by seemingly random conversation and very sudden, booming hails.  We were forced to lower the volume when the jolting hails began to send Nikka shaking and flying from her bed.  Her least favorite type of hail, a very sudden, piercing whistle repeated three times in quick succession before a quick pause and two final whistles.  Upon first hearing such an ear piercing nondescript hail, we assumed that similar to the U.S, the person was likely intoxicated and enjoyed the idea of their voice going out to a wide and compulsory audience.  Not so in Mexico it turns out.  The legitimacy of the hail was confirmed for us when we heard a man, whom we could only assume was not able to whistle, repeat the words,

“whistle, whistle, whistle” pause “whistle, whistle!”

My favorite Mexican VHF moment so far this trip was when Erik and I, surprisingly bored of each other’s company by day 2 of a 5 day sail, contemplated finding some music to play in the cockpit.  Erik quickly waved the idea away, saying, “sounds great, but we don’t have any music.”  Just as the sic in music left his lips the VHF sprang to life with the sounds of a mariachi band in full swing.  Until the music broke off about 2 minutes later, Erik and I just stared at each other in disbelief.  Then after checking to make sure our mic wasn’t keyed, laughed until tears welled up in our eyes.  We tempted fate again with “we don’t have any ice cream,” hoping that if an ice cream sandwich did not drop from the sky at least a Dryer’s commercial might play from our speakers.

But nothing, so we settled back into the cockpit, still a little weary about who may be listening.

As a side note:  VHF in Mexico utilizes the USA channel list, as opposed to the international channel list, which we had assumed when we first arrived.  The different channel lists are similar enough to make you think you have it right, but different enough to drive you crazy.  For example, due to restricted frequencies in the US, Channel 22 receives on a different frequency than the International setting, making it very difficult to hear morning nets and communicate with other cruisers who exclusively use Ch. 22.

Real-time Global Wind and Ocean Current Map

Earth global wind patterns


Want to be mesmerized by global wind patterns? No? Well maybe you will change your mind after taking a look at this great site. This nifty tool can be used to view earth’s wind patterns in real time using visually stimulating graphics. Not only can you view surface wind, but you can also take a look at ocean currents and temperatures by simply clicking on the earth logo in the lower left. Want a better way to visualize trade winds? Need to see how global wind patterns influence local weather? This may help.


I have just stumbled across this site but can already see its potential as a very useful tool for planning on our upcoming sailing adventure.  By getting a global view of weather patterns and wind intensity, it gives you one more tool to add to your weather toolbox. It’s not like you couldn’t do this before, just not in such a fun way! Have fun and enjoy this great tool…


Earth wind navigation


http://earth.nullschool.net/


Nissan Xterra rear sleep platform

“I’m too long, can’t we just chop the lower few inches off my legs?” I said exacerbated as I lay cramped and contorted in the back of a fully packed Xterra. “Quit being a baby!” is Meagan’s quick response. This conversation is visited and re-visited during our long adventures into the backcountry, trying to stealth camp in illustrious locations such as: the Wrangell Mountains, the Dalton Highway, and dimly lit corners of Wal-Mart parking lots. I find myself too tired to keep driving and Meagan uses the wonderful excuse that driving at night “makes my eyes hurt”. In the end we are forced to push all our stuff to the front seats and side of the car, lay out our sleeping bags and pads, jump in and try and get situated before calling the dogs up to come lay on top of us. All this in the space that is usually reserved for ones yoga mat.

In an effort to avoid these uncomfortable situations on our future journey, we came up with a solution. Albeit stolen heavily from others’ internet posts and forum discussions. The idea is to provide an elevated sleeping platform which can be folded out once  parked to provide a full 6 ft 3 in bed. On top we would have our refrigerator, dog bed, and people bed. Underneath would be adequate storage for most of our belongings. Simple, cheap, and effective. Just our style. Below are some images of the sleep platform right after construction. And one on the trip down south from Fairbanks all the way to Florida! Notice the outboard on the roof. You never can be too prepared…


rear vehicle sleep platform

rear view with fridge and water jugs

homemade sliders

close up of homemade fridge slides

20130921LeavingAK6046

fridge slid out

20130921LeavingAK6050

tie down points

20130924LeavingAK1047

fully loaded with gear

20130924LeavingAK1049

all dirty with outboard on roof

Viewing comet PanSTARRS in Polar and Northern Latitudes

For those of us living in the Northern Latitudes, specifically closer to the circumpolar region, spotting PanSTARRS will be difficult. Especially given the lack of usable information regarding when and where to look in the night sky for our region. While out the night of March 12th, I was trying to watch for PanSTARRS below the setting crescent moon during twilight as numerous sites have stated. Unfortunately, PanSTARRS was still too far below the horizon up here in Fairbanks, AK. Although there was no visible comet the setting moon was still a striking image with the clear skies  we have been having.

setting crescent moon at twilight


While doing some more research into where the comet will be at what time, I lucked across this useful diagram.


come PanSTARRS sky map


So now anyone with an iphone or android device can know exactly where to look in the sky to see PanSTARRS using one of the many freely available stargazing apps such as SkyView.

So when will I be out looking again? You can be sure I will be looking around the Andromeda galaxy region of the sky in early April. When will you go out? Have you seen PanSTARRS? Let me know in the comments below!

8 Things to Help Your Cold Weather Photography


For some of us living in northern (or extreme southern) latitudes, winter photography can be more challenging than simply adding an extra wind breaker, it can be downright life threatening. Sitting and watching the aurora dance overhead while sipping hot cocoa, while an alluring fantasy, is far from the reality. Many times we find ourselves up in the wee hours standing in a wind-blown field with temps reaching -20 F or colder for hours, without hot chocolate, frantically trying to adjust camera settings while at the same time trying to minimize how long our fingers are exposed to the toxic air. This is by no means a cold weather photo survival guide, but a list of things I have found that help keep your camera running and your fingers attached. Even seasoned cold-weather photographers may find something they hadn’t heard about, and be sure to share what you do in the cold in the comments below.


1) Keep spare batteries in your pocket (close to your body)

Most electronics don’t like cold, especially battery operated ones. Cameras will eat up a battery much faster as the mercury drops, which often means carrying multiple spares for your freezing camera. Don’t leave those batteries in your camera bag though, stick them in your pockets the closer to your body the better that way you always have warm fresh batteries. You can often eke out a few more shots on a battery by repeatedly warming them up with your body and sticking them back in the camera.


snow drift cornice

2) Stick a hand warmer under the camera battery door

I like to keep some of these guys around not only for myself, but also for the camera. They can be great when you need to keep a single battery going for as long as possible (long exposure or time-lapse). I stick the hand warmer underneath the battery door and then wrap a rubber band around to hold it in place, simple and effective. I have gotten an extra hour out of a battery by doing this.

3) Use moleskin

Contact frostbite by touching an item that is already cold is one of the fastest acting cold injuries. In order to protect your face while composing your shot against the camera viewfinder, try adding moleskin to the areas you touch, the kind backpackers use to keep away blisters.

4) Use mittens with a set of small liners

Mittens come in a variety of styles; the only ones I have found that have enough dexterity not to annoy me have leather palms. I use a pair of Black Diamond Mercury mitts and find them to be very warm (used in -60 F) and due to their internal design, very dexterous.  A good set of mittens will allow your hand to warm itself up much quicker with frequent hand removal than a glove. In order to help your hand while outside the mitten and to keep steam from rising off your hand and fogging your lens, I like to use a small wool or synthetic liner glove like these ones made by Mountain Hardware. This allows me to work the camera for short periods of time and then quickly put my mittens back on to warm up. The nice thing about mittens is you can have a hand warmer inside them warming up your fingers and not your palms.


5) Hold your breath

 Not the whole time but every time you put your head close to your camera. Any warm moisture that escapes your lips will freeze to the first cold thing it hits, which will be your lens or viewfinder. This can be real bummer, and possibly stop you whole photo session until you can clear it away.

6) Minimize Live View

Most modern DSLRs have live view now, this can be great for setting up composition and achieving critical focus while keeping your face and breath away from the camera, however, it eats up the battery. So no need to not use it, just don’t spend overly long in this mode, or spend too long reviewing your images on the LCD.

7) Wrap your tripod legs in pipe foam

Tripods are an essential tool for night and landscape photography; I use my trusted Manfrotto 055XPROB and have come to love one of its features. Two of the legs are covered in rubber/foam where you hold onto it. This keeps you from touching the ice-cold tripod metal. Don’t fret, this can easily be added to any tripod for a few bucks using standard pipe foam. And if looks are your thing, just remove the pieces when summer comes around so people won’t laugh at you.

8) Use a wrapper (for the camera)

Before you go back inside a warm area, take the time and put your camera inside a waterproof barrier. I like to use a pelican case, however a simple plastic bag can be all that you need. Place the camera inside and forget about it for a few hours. You need to let the camera reach room temperature (or close to) before opening the barrier. This is because as the cold camera enters a warm body of air, all the moisture in the air will freeze onto the camera later melting and getting on the sensor and other sensitive electronic parts inside possibly damaging them. If waiting a few hours is too long before seeing your photos, it is for me, take the memory card out before going inside and place it in a ziploc by itself. This allows the memory card to warm up in a matter of minutes not hours.


open north american 2012